Livestreaming with OBS: A Complete Feature Guide

Creators can now stream on Fanfix using OBS Studio or other livestreaming tools like Streamlabs. This allows you to use external cameras, audio interfaces, overlays, and more advanced setups directly in your Fanfix livestream.
Here’s how to set it up:
Step 1: Start Your Livestream on Fanfix
- Go to Create → Livestream
- Add your Title
- Choose your Access settings (e.g., free, paid, comments on/off)
- Set your Tipping preferences (e.g., enable tips, add a tip goal if needed)
This sets the foundation of your livestream. Next, you’ll connect OBS.
Step 2: Select "WHIP" in Video & audio controls
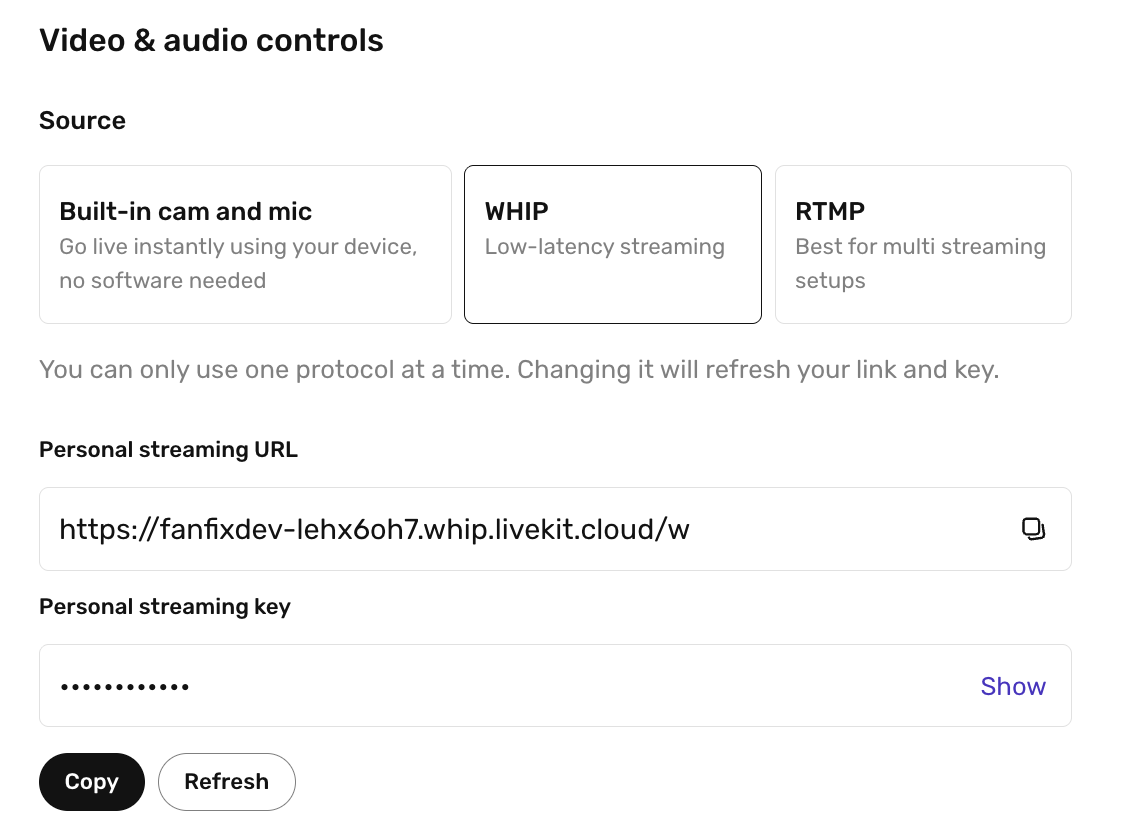
In the Video & audio controls section:
- Switch your Source to WHIP
- Copy your Personal Streaming URL
- Copy your Personal Streaming Key
These two values connect Fanfix to OBS.
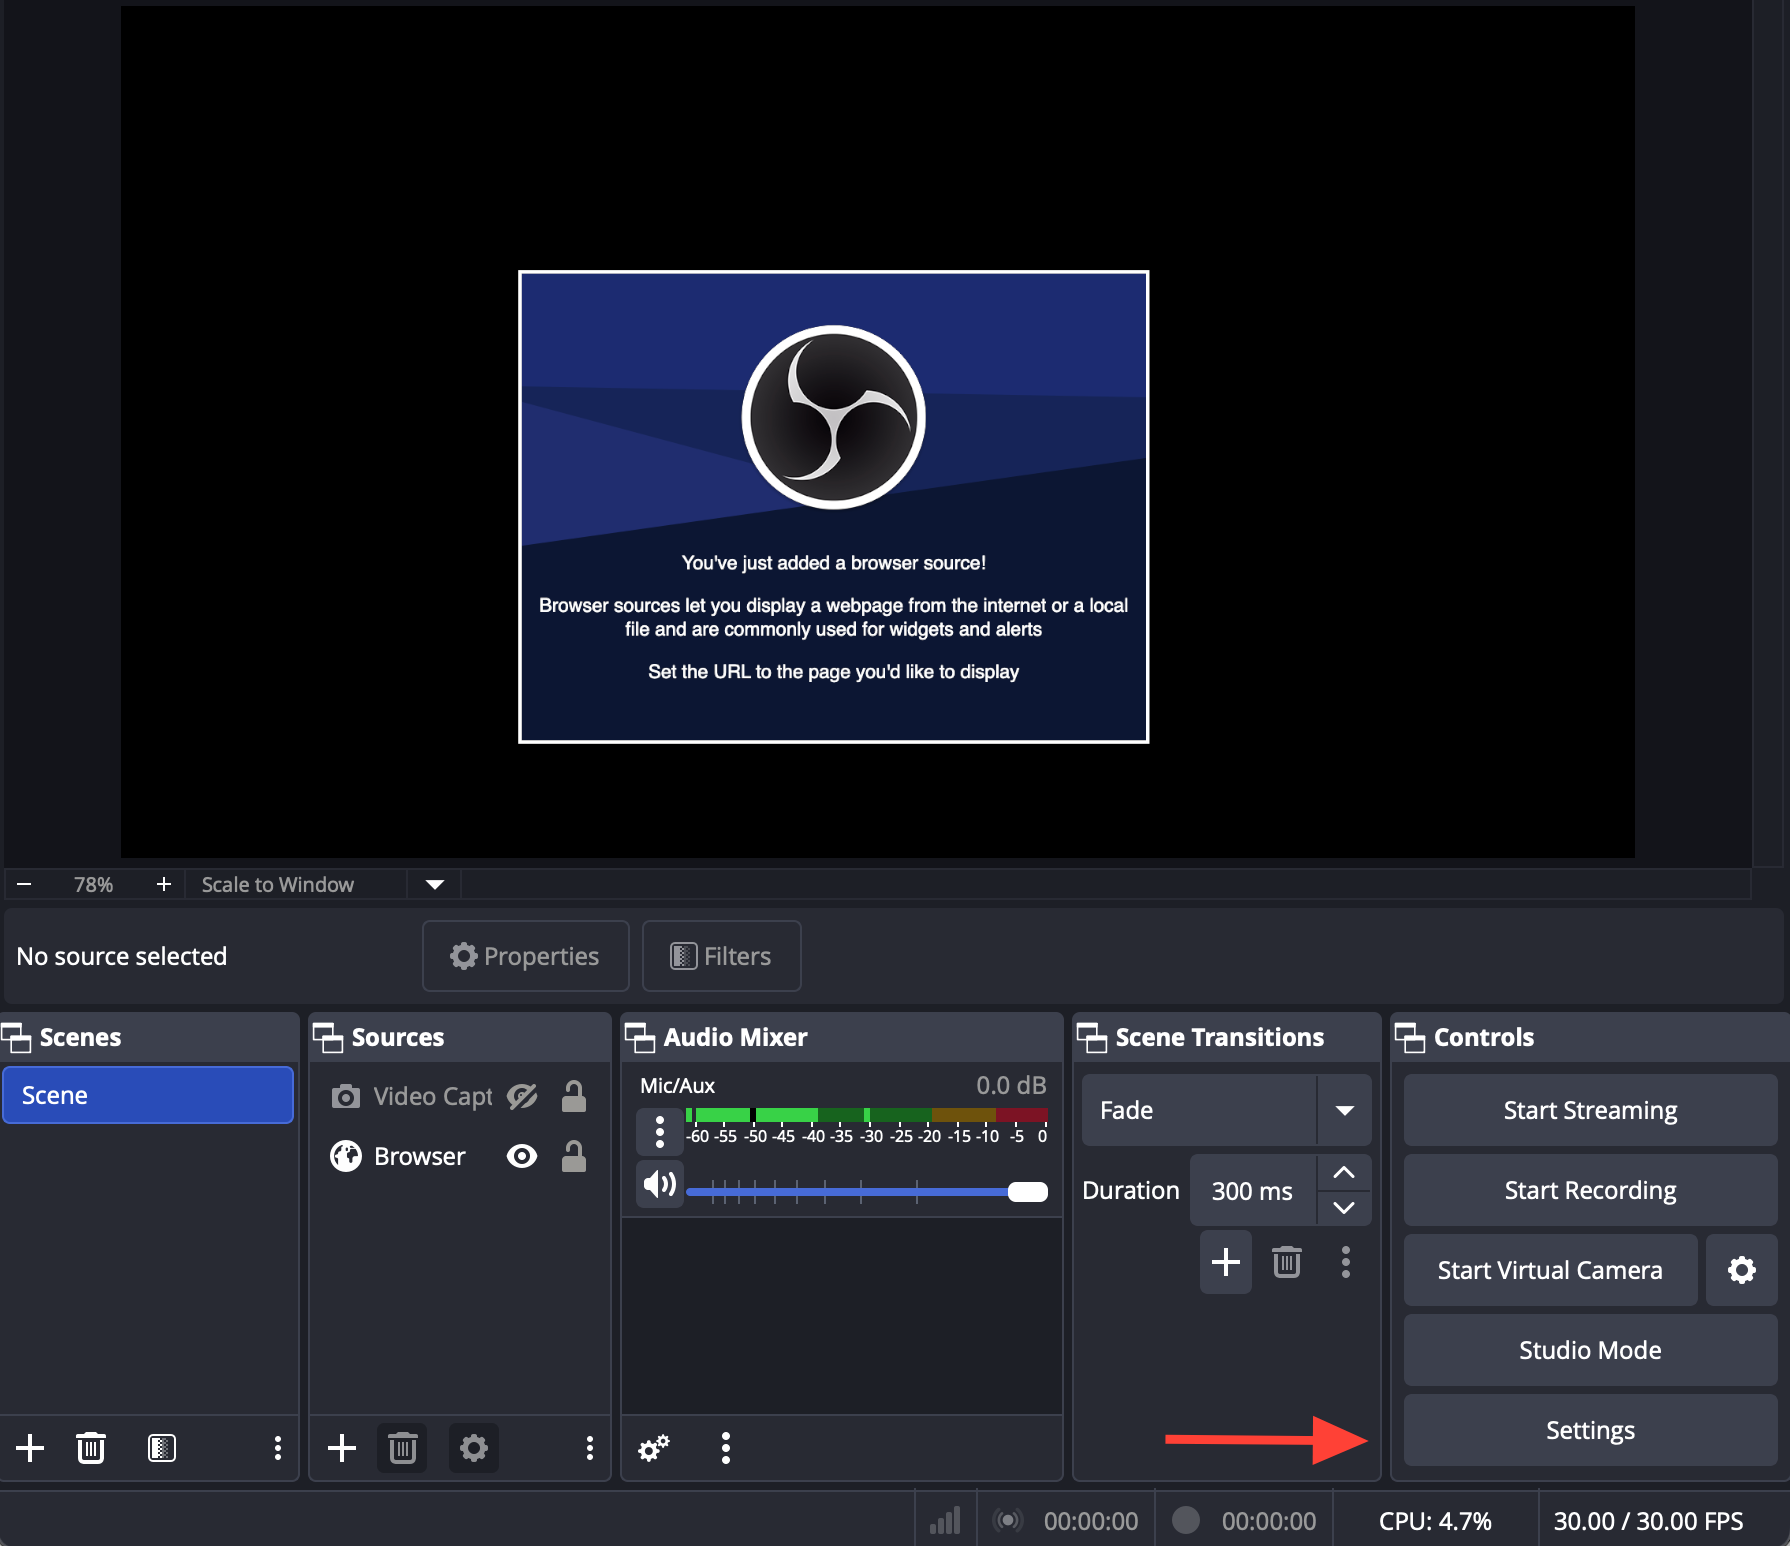
Step 3: Configure OBS
Open OBS Studio, then:
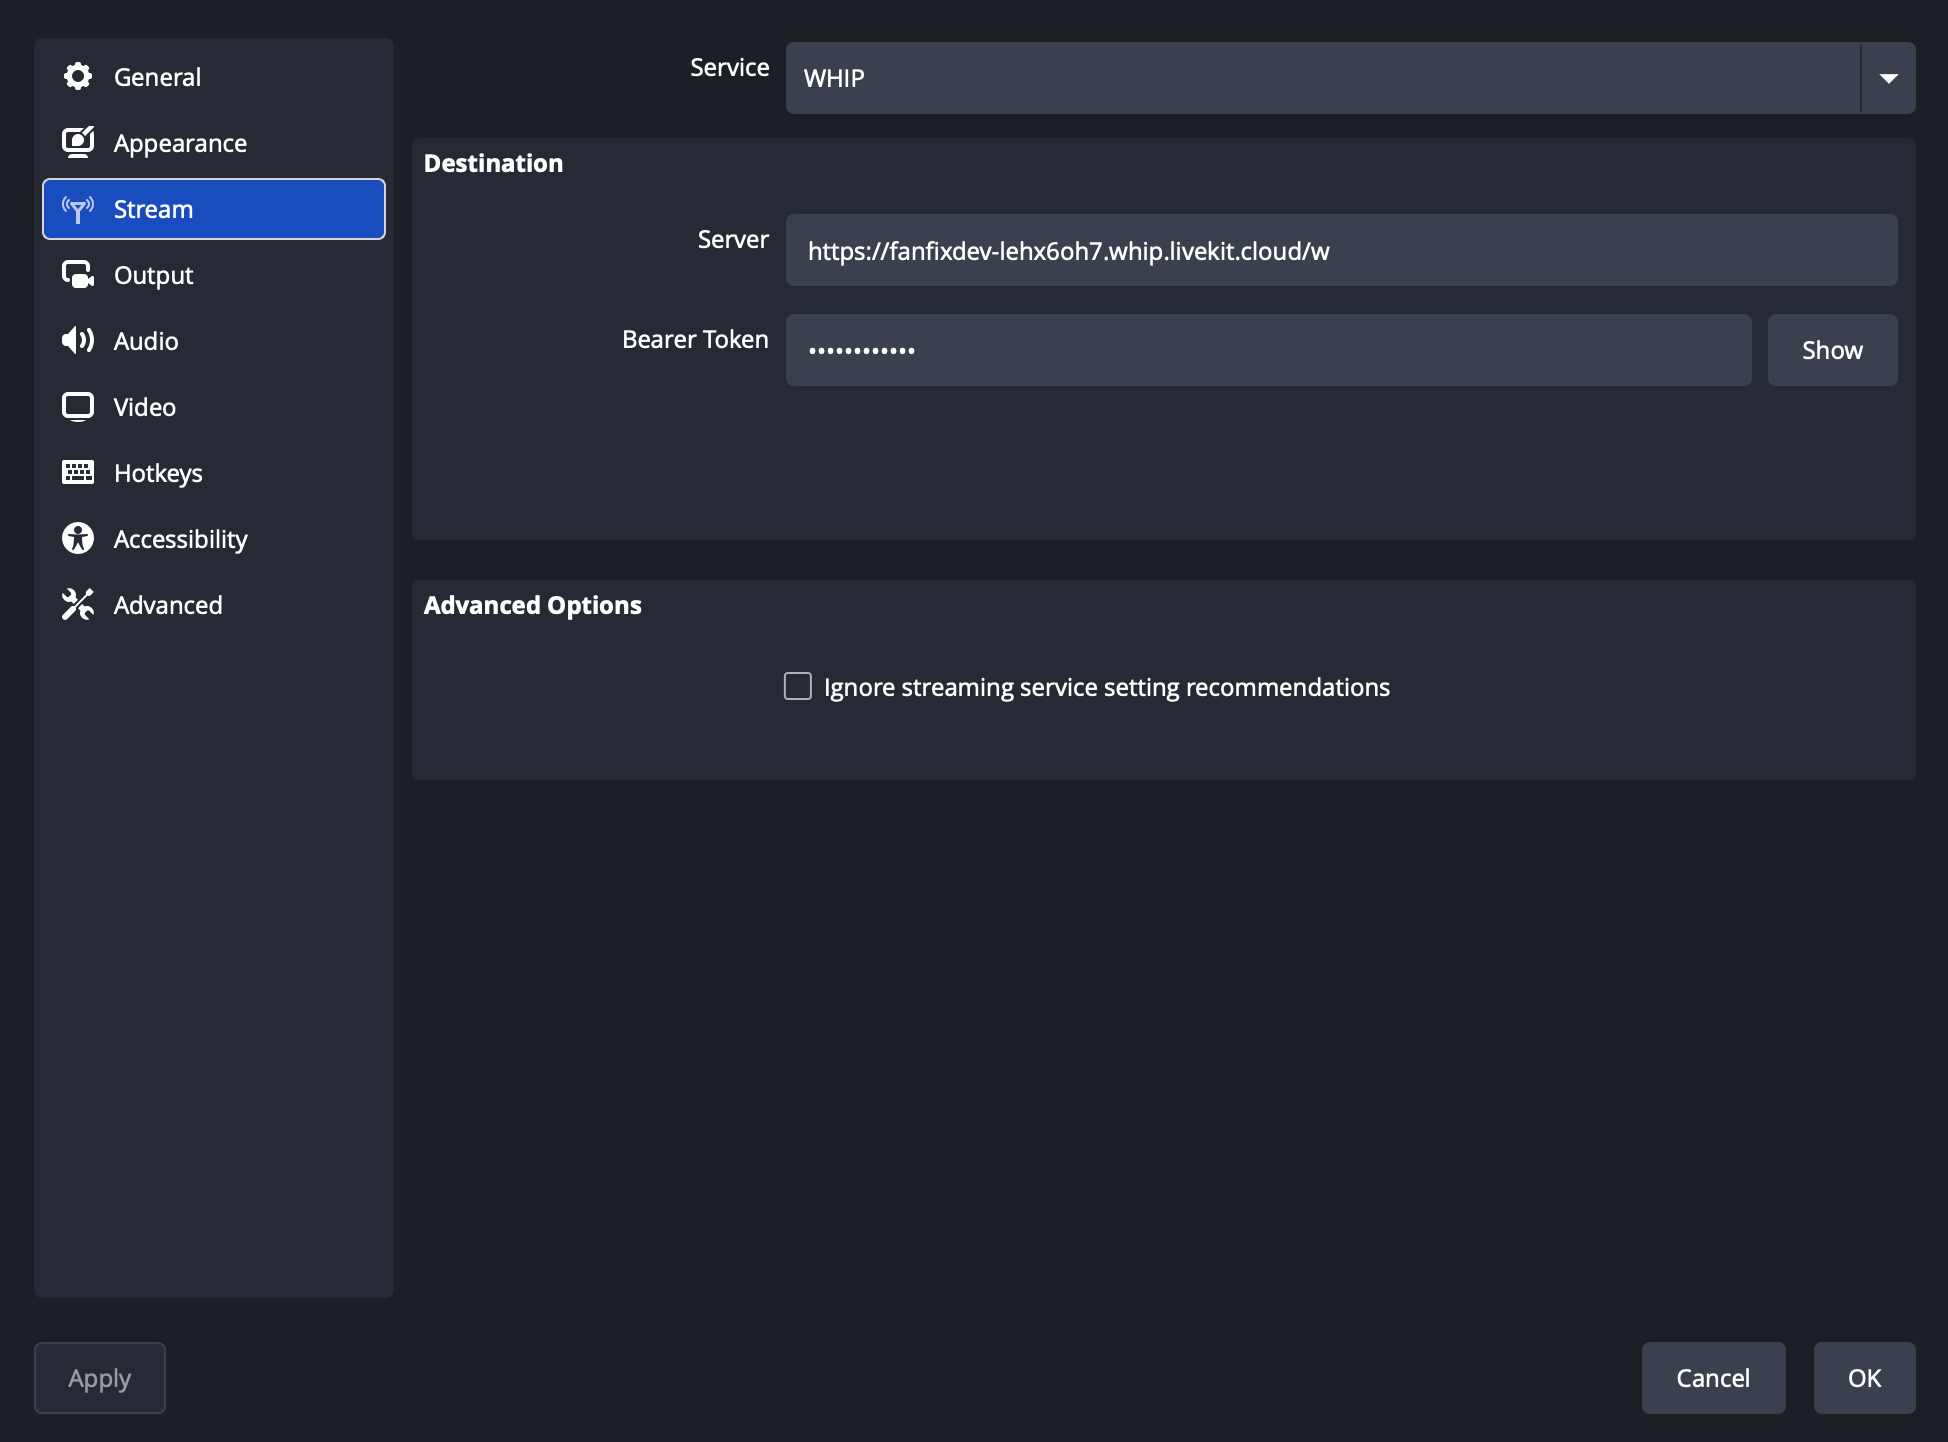
- Go to Settings → Stream
- Set Service to WHIP
- Paste your Personal Streaming URL into the Server field
- Paste your Personal Streaming Key into the Bearer Token field
- Click OK
Once this is set, OBS is linked to your Fanfix livestream.
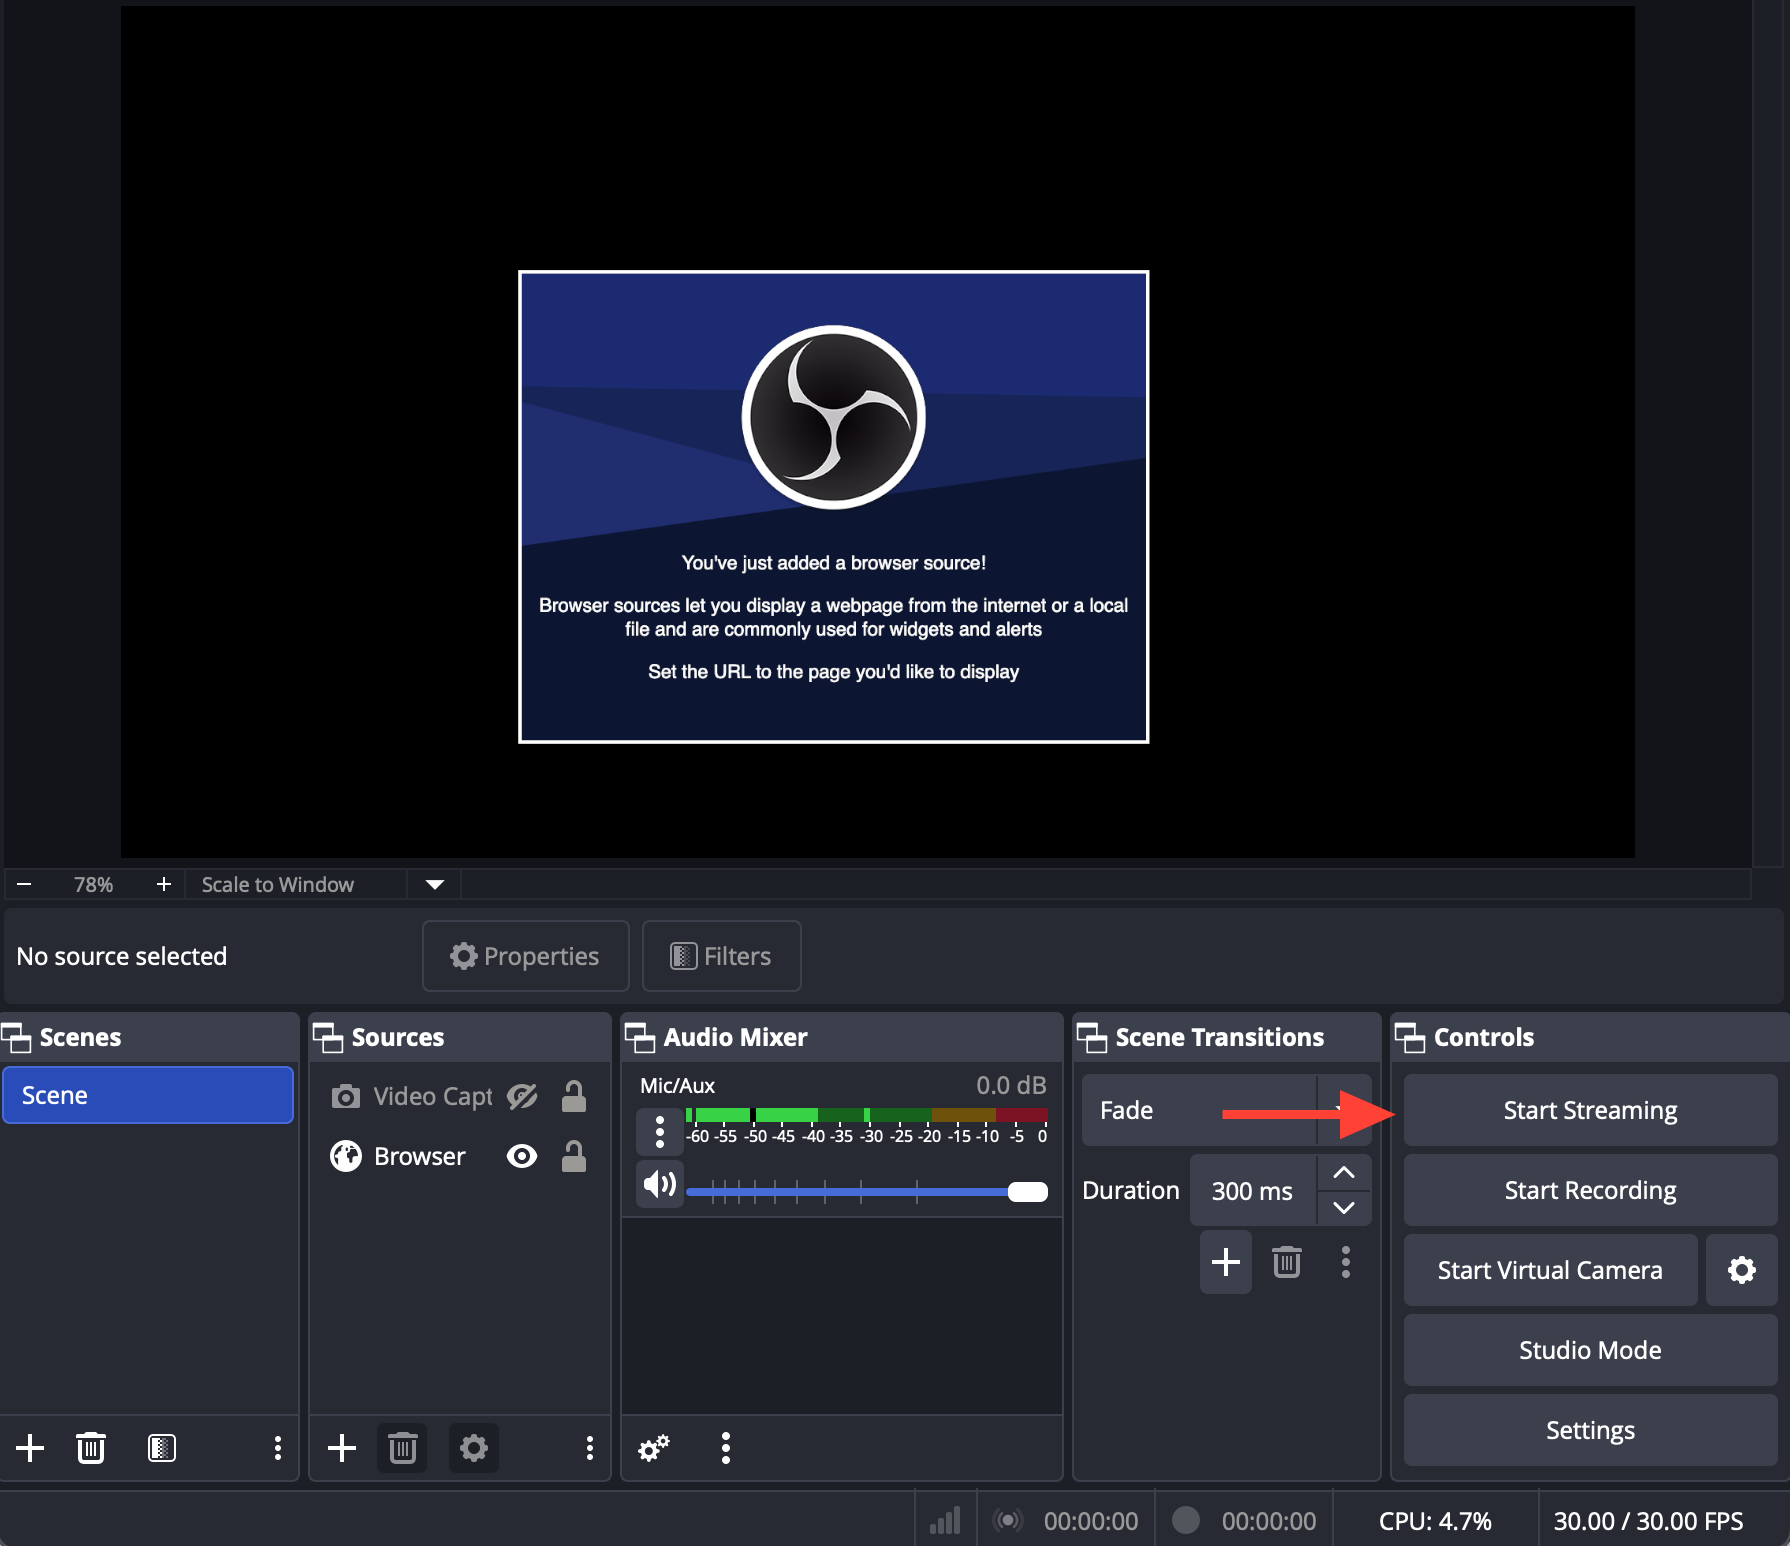
Step 4: Start Streaming
Once your server URL and stream key are saved in OBS, you’re ready to go.
Add your camera, mic, and any overlays you want, then click Start Streaming. Fanfix will detect your feed instantly.
Your livestream will sit in a pending state until you hit Start livestream in the Fanfix app to go live for fans.
That’s It — You’re Live with OBS
We’ll continue improving OBS support (including multi-streaming), so keep an eye out for updates.